Configuring Screens
Using ASM Designer, you can configure screens by:
- Adding Fields on screens, forms and message templates, renaming and removing fields and configuring field properties
- Altering screen and form layouts, as described below
- Configuring buttons on vFire Self Service screens
- Creating Screens for most core entities
- Creating Message Templates, and Configuring Message Templates
For a full list of screens available for configuration, see Screens Available for Configuration.
You cannot use ASM Designer to modify the Explorer pane or screens accessed through the Explorer options, Search windows, Administration windows, Forward and Close windows, or the HTML Only interface screens.
ASM Designer is not intended to be used for advanced customizations of ASM Core. If you require any enhancements that are outside the scope of ASM Designer, talk to your Alemba account manager.
Changing Screen Colors
You can change the color of the screen background, title background, title font and key borders in the Details windows used in ASM Core.
Before you start
Exercise caution when using ASM Designer to modify screen designs which have been customized by Alemba Professional Services. Contact your Alemba account manager if you are uncertain about whether your actions will impact these customizations.
To modify screens using ASM Designer, you must have Designer selected in the Admin tab of your General Access Security Role.
You cannot change the colors on a service desk form, portal review screen, submission screen or message template using Styles.
To maintain an audit trail of changes made to screens, configure the audit trail in the Auditing settings.
 Display the ASM Designer window if it is not already visible on screen.
Select
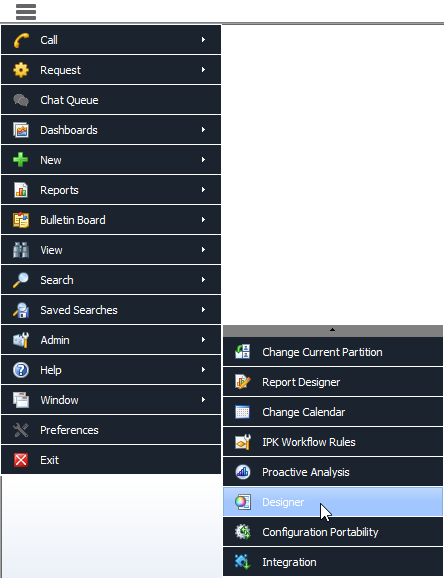
 and then Admin.
From the submenu, select Designer.
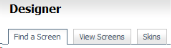
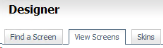
This window consists of three tabs. They display different views:Find a Screen Can be used to search for and work with specific screens, forms or message templates, as well as create new in-house screens View screens Displays details of currently selected screens and is used to modify screens Skins Enables you to create and modify skins for your Self Service Portal(s) - Find the screen, if it is not already displayed.
- Make the Find a Screen tab uppermost, if necessary.
- Select the entity type (such as Call) from the left pane. The table displays the configurable screens, templates and forms associated with the selected entity, with the first one highlighted. Items you cannot create or configure are not included. The number of screens associated with the selected entity is displayed in the bottom right hand corner of the window.
- Filter and sort the screens if you wish:
- Select the screen, template or form you wish to work with, and select
 at the bottom of the window. To select multiple screens, select one and hold down the Shift or Ctrl key and select the rest.
 - The window changes and if you look in the top left corner, you will see that the View Screens tab is now uppermost.
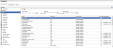
The left pane contains an alphabetical list of the main entity types in ASM Core (such as, Agreement, Bulletin, Call, etc) with which screens are associated.
The main pane has a set of filters across the top of the window, beneath which there is a browse table, which is currently empty, containing the following fields:
Name name of the screen, template or form Screen Set to which the screen, template or form belongs Screen Design which could be Service Desk Form (linked to a particular entity, eg Call Default Form), Service Desk (the details screen used in ASM Core), Self Service Portal (submission or review screen) or Message Template (for emails generated by the system following certain events such as an Availability Breach) Customized Whether the screen, template or form has already been configured in the ASM Designer Last Modified The date and time of any modification, including when a field was created, linked to a screen set and any other modifications to field properties To filter the number of entries displayed on the table, use the fields at the top of the window:
Screen Name Type a name and select  .
.Screen Set A drop-down list of all screen sets. Each entity type has a standard screen set which has the same name as the entity. For example, the default screen set for calls is Call Screen Set.
Certain entity types, such as Organization, Person, Agreement and Location, only have default screen sets. Others, such as Call, Request, Task, CMDB item, Contract and Knowledge can have custom screen sets and these will appear on the list. Only one Details screen and one Submission screen can exist per screen set. You can have multiple message templates and service desk forms in the same screen set.
Screen Design A drop-down list of available designs To sort the information, click on the required column heading (such as Name). The entries are displayed in alphabetical order for that column.
You can also view a history of changes to a screen, create new screens, delete and rename screens and view deleted screens from this window.
You can select the Find a Screen tab again if you wish to select a different screen.
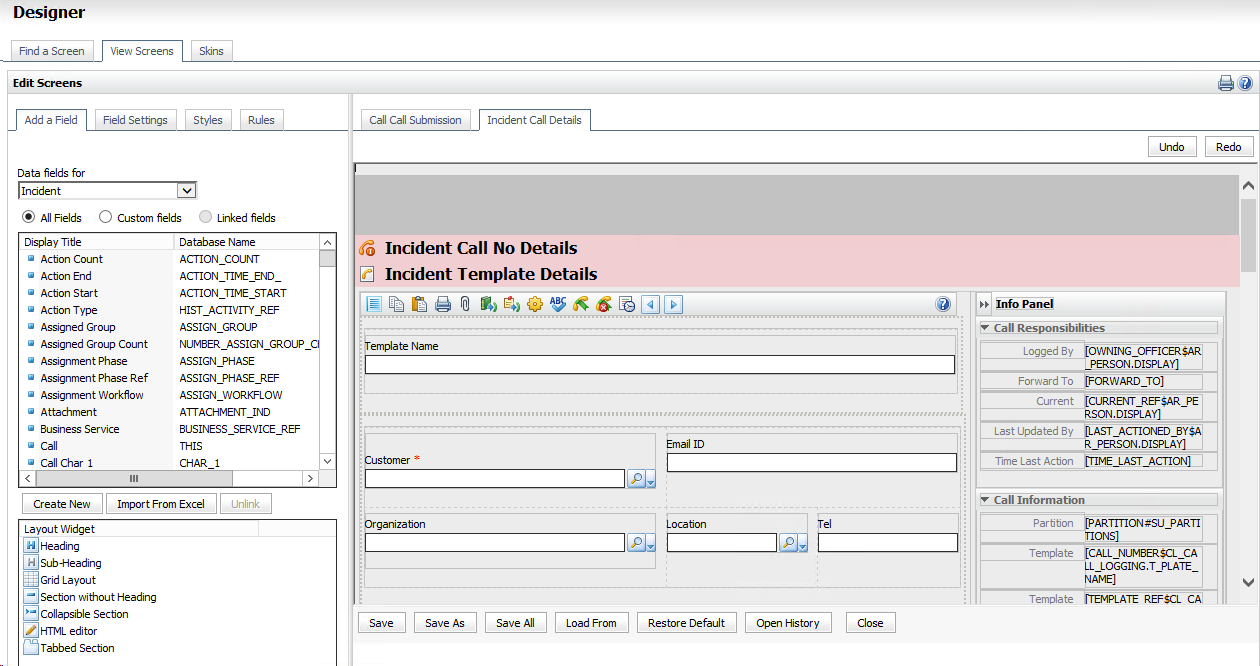
Each selected screen, form, or message template appears in its own tab within the ASM Designer window
 . The naming of the screens is [screen set name] [screen name], for example, Call Call No Details. If the screen belongs to the default screen set for an entity, the name of the tab is [entity name] [screen name], for example, Agreement Agreement Details. When you open a portal screen, such as Call Submission, two blank columns are displayed on the right.
  You can configure the screen by inserting fields into these columns. If you place them outside of that column grid, they will not appear on the Self Service Portal.
 - Make the Find a Screen tab uppermost, if necessary.
- Select Open Screen to display the details, if they are not already on screen.
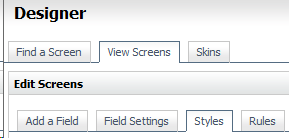
- Make the Styles tab in the left hand pane uppermost
 . This view may look different for the different screen designs you can configure.
 - Make the appropriate style selections. Click on the down arrow and select from the listed colors, scrolling down if necessary. Alternatively, use Custom Color to specify your own.
 You can edit the following properties:
Screen Background Color Select a background color for the screen
Title Background Color Select a color for the header background Title Font Color Select a color for the header font
Key Border Color Select a color for the Info Panel - Select
 to update the screen.
 -
Select Save at the bottom of the window to save changes to the current screen or Save As to save the content as an HTML file. The file can then be edited with any HTML editor. However, you should be aware that any instability as a result of modifications made outside the ASM Designer is not covered by your Alemba® support and maintenance agreement. When you export a screen, form or message template, images embedded on to the template are not exported. When you load an exported screen, form or message template into ASM Core, you will need to re-add any images. Save All saves changes to all open screens. If auditing is turned on, the Change Reasons window will display, prompting you to add a change reason.

If there are no color settings for the screen, you will see the message stating "No page styles are applicable to this screen." Select the Find a Screen tab to select an alternative screen if you wish.

Configuring Screen Layout
You can alter screens by inserting, moving and deleting different layout elements, also referred to as ‘layout widgets’. No layout widgets are available for insertion into a message template.
You can modify the appearance of Details windows used in ASM Core. The layout elements that can be inserted depend on the screen type.
Before you start
Before modifying screens, we strongly recommend that you undertake appropriate training on ASM Designer.
Exercise caution when using ASM Designer to modify screen designs which have been customized by Alemba Professional Services. Contact your Alemba account manager if you are uncertain about whether your actions will impact these customizations.
To modify screens using ASM Designer, you must have Designer selected in your General Access Security Role.
To maintain an audit trail of changes made in ASM Designer, configure the audit trail in the Auditing settings.
- Display the ASM Designer window if it is not already visible on screen.
Select
and then Admin.From the submenu, select Designer.
This window consists of three tabs. They display different views:Find a Screen Can be used to search for and work with specific screens, forms or message templates, as well as create new in-house screens View screens Displays details of currently selected screens and is used to modify screens Skins Enables you to create and modify skins for your Self Service Portal(s) - Find the screen, if it is not already displayed.
- Make the Find a Screen tab uppermost, if necessary.
- Select the entity type (such as Call) from the left pane. The table displays the configurable screens, templates and forms associated with the selected entity, with the first one highlighted. Items you cannot create or configure are not included. The number of screens associated with the selected entity is displayed in the bottom right hand corner of the window.
- Filter and sort the screens if you wish:
- Select the screen, template or form you wish to work with, and select at the bottom of the window. To select multiple screens, select one and hold down the Shift or Ctrl key and select the rest.
- The window changes and if you look in the top left corner, you will see that the View Screens tab is now uppermost.
The left pane contains an alphabetical list of the main entity types in ASM Core (such as, Agreement, Bulletin, Call, etc) with which screens are associated.
The main pane has a set of filters across the top of the window, beneath which there is a browse table, which is currently empty, containing the following fields:
Name name of the screen, template or form Screen Set to which the screen, template or form belongs Screen Design which could be Service Desk Form (linked to a particular entity, eg Call Default Form), Service Desk (the details screen used in ASM Core), Self Service Portal (submission or review screen) or Message Template (for emails generated by the system following certain events such as an Availability Breach) Customized Whether the screen, template or form has already been configured in the ASM Designer Last Modified The date and time of any modification, including when a field was created, linked to a screen set and any other modifications to field properties To filter the number of entries displayed on the table, use the fields at the top of the window:
Screen Name Type a name and select .Screen Set A drop-down list of all screen sets. Each entity type has a standard screen set which has the same name as the entity. For example, the default screen set for calls is Call Screen Set.
Certain entity types, such as Organization, Person, Agreement and Location, only have default screen sets. Others, such as Call, Request, Task, CMDB item, Contract and Knowledge can have custom screen sets and these will appear on the list. Only one Details screen and one Submission screen can exist per screen set. You can have multiple message templates and service desk forms in the same screen set.
Screen Design A drop-down list of available designs To sort the information, click on the required column heading (such as Name). The entries are displayed in alphabetical order for that column.
You can also view a history of changes to a screen, create new screens, delete and rename screens and view deleted screens from this window.
You can select the Find a Screen tab again if you wish to select a different screen.
Each selected screen, form, or message template appears in its own tab within the ASM Designer window
. The naming of the screens is [screen set name] [screen name], for example, Call Call No Details. If the screen belongs to the default screen set for an entity, the name of the tab is [entity name] [screen name], for example, Agreement Agreement Details. When you open a portal screen, such as Call Submission, two blank columns are displayed on the right. You can configure the screen by inserting fields into these columns. If you place them outside of that column grid, they will not appear on the Self Service Portal. - Make the Find a Screen tab uppermost, if necessary.
- Select Open Screen from the bottom of the window if the details are not already displayed on screen.
- Ensure that the Add a Field tab is uppermost.

- At the top of the left pane, you will see the Data fields for box, displaying the screen type you are working with. Beneath this is a list of the fields which you can add, configure or delete. Further down the pane you will see the Layout Widget box.

- From the Layout Widget box, drag and drop the elements straight onto the screen you are editing.
-
Select Save at the bottom of the window to save changes to the current screen or Save As to save the content as an HTML file. The file can then be edited with any HTML editor. However, you should be aware that any instability as a result of modifications made outside the ASM Designer is not covered by your Alemba® support and maintenance agreement. When you export a screen, form or message template, images embedded on to the template are not exported. When you load an exported screen, form or message template into ASM Core, you will need to re-add any images. Save All saves changes to all open screens. If auditing is turned on, the Change Reasons window will display, prompting you to add a change reason.

If you cannot see this, you cannot alter the layout of the screen.
| Heading |
enables you to add headings or titles to a screen. Use the Label property in the Field Settings to edit the heading title. Available for service desk screens, portal screens and service desk forms |
| Sub Heading |
enables you to add a sub heading to a screen. Use the Label property in the Field Settings to edit the heading title. Available for service desk screens, portal screens and service desk forms |
| Minor Heading |
enables you to add a sub heading to a vFire Self Service screen. Use the Label property in the Field Settings to edit the heading title. Only visible for vFire Self Service screens |
| Grid Layout |
enables you to insert content into a fixed, four-column layout. A grid layout does not have a border and must be inserted into one of the Section widgets. Available for service desk screens, portal screens and service desk forms |
| Section without Heading |
enables you to divide a screen up for readability, grouping related fields inside a box with a border. Available for service desk screens, portal screens and service desk forms |
| Collapsible Section |
enables you to divide a screen up for readability, grouping related fields inside a box with a border. Users can expand or contract a collapsible section. Available for service desk screens and service desk forms |
| HTML editor |
enables you to insert an HTML editor onto a screen. The HTML toolbar allows formatting of the text entered into an HTML text area. You can only insert an HTML editor into a section. HTML editors have a fixed width (the same width as the screen), no fixed height (expands to the required height according to its contents), and floating toolbar (displays only when the HTML toolbar has the focus). You cannot insert HTML editors into a Grid Layout. |
| Tabbed Section |
enables you to add a tabbed section onto a screen. Tabbed sections are not available for vFire Self Service screens. |
Repositioning a Layout Element
You can move fields to different positions on the screen, to accommodate new fields, or simply because it makes more sense for your organization.
Before you start
Before editing screens, we strongly recommend that you undertake appropriate training on ASM Designer.
Exercise caution when using ASM Designer to modify screen designs which have been customized by Alemba Professional Services. Contact your Alemba account manager if you are uncertain about whether your actions will impact these customizations.
To reposition layout elements on a screen using ASM Designer, you must have Designer selected in your General Access Security Role.
To maintain an audit trail of changes made in ASM Designer, configure the audit trail in the Auditing settings.
- Display the ASM Designer window if it is not already visible on screen.
Select
and then Admin.From the submenu, select Designer.
This window consists of three tabs. They display different views:Find a Screen Can be used to search for and work with specific screens, forms or message templates, as well as create new in-house screens View screens Displays details of currently selected screens and is used to modify screens Skins Enables you to create and modify skins for your Self Service Portal(s) -
Find the screen, if it is not already displayed.
- Make the Find a Screen tab uppermost, if necessary.
- Select the entity type (such as Call) from the left pane. The table displays the configurable screens, templates and forms associated with the selected entity, with the first one highlighted. Items you cannot create or configure are not included. The number of screens associated with the selected entity is displayed in the bottom right hand corner of the window.
- Filter and sort the screens if you wish:
- Select the screen, template or form you wish to work with, and select at the bottom of the window. To select multiple screens, select one and hold down the Shift or Ctrl key and select the rest.
- The window changes and if you look in the top left corner, you will see that the View Screens tab is now uppermost.
The left pane contains an alphabetical list of the main entity types in ASM Core (such as, Agreement, Bulletin, Call, etc) with which screens are associated.
The main pane has a set of filters across the top of the window, beneath which there is a browse table, which is currently empty, containing the following fields:
Name name of the screen, template or form Screen Set to which the screen, template or form belongs Screen Design which could be Service Desk Form (linked to a particular entity, eg Call Default Form), Service Desk (the details screen used in ASM Core), Self Service Portal (submission or review screen) or Message Template (for emails generated by the system following certain events such as an Availability Breach) Customized Whether the screen, template or form has already been configured in the ASM Designer Last Modified The date and time of any modification, including when a field was created, linked to a screen set and any other modifications to field properties To filter the number of entries displayed on the table, use the fields at the top of the window:
Screen Name Type a name and select .Screen Set A drop-down list of all screen sets. Each entity type has a standard screen set which has the same name as the entity. For example, the default screen set for calls is Call Screen Set.
Certain entity types, such as Organization, Person, Agreement and Location, only have default screen sets. Others, such as Call, Request, Task, CMDB item, Contract and Knowledge can have custom screen sets and these will appear on the list. Only one Details screen and one Submission screen can exist per screen set. You can have multiple message templates and service desk forms in the same screen set.
Screen Design A drop-down list of available designs To sort the information, click on the required column heading (such as Name). The entries are displayed in alphabetical order for that column.
You can also view a history of changes to a screen, create new screens, delete and rename screens and view deleted screens from this window.
You can select the Find a Screen tab again if you wish to select a different screen.
Each selected screen, form, or message template appears in its own tab within the ASM Designer window
. The naming of the screens is [screen set name] [screen name], for example, Call Call No Details. If the screen belongs to the default screen set for an entity, the name of the tab is [entity name] [screen name], for example, Agreement Agreement Details. When you open a portal screen, such as Call Submission, two blank columns are displayed on the right. You can configure the screen by inserting fields into these columns. If you place them outside of that column grid, they will not appear on the Self Service Portal. - Make the Find a Screen tab uppermost, if necessary.
- Select Open Screen from the bottom of the window if the details are not already displayed on screen.
- Drag and drop the elements you wish to reposition. Bear in mind that grids must appear within section widgets.
-
Select Save at the bottom of the window to save changes to the current screen or Save As to save the content as an HTML file. The file can then be edited with any HTML editor. However, you should be aware that any instability as a result of modifications made outside the ASM Designer is not covered by your Alemba® support and maintenance agreement. When you export a screen, form or message template, images embedded on to the template are not exported. When you load an exported screen, form or message template into ASM Core, you will need to re-add any images. Save All saves changes to all open screens. If auditing is turned on, the Change Reasons window will display, prompting you to add a change reason.
Removing a Layout Element
You can remove layout elements from screens within ASM Designer. This permanently removes the layout element as well as any fields contained within it. If you do not wish to permanently remove the element, you can flag it as "hidden" using the Field Settings tab.
Before you start
Before editing screens, we strongly recommend that you undertake appropriate training on ASM Designer.
Exercise caution when using ASM Designer to modify screen designs which have been customized by Alemba Professional Services. Contact your Alemba account manager if you are uncertain about whether your actions will impact these customizations.
To modify screens using ASM Designer, you must have Designer selected in your General Access Security Role.
To maintain an audit trail of changes made to screens, forms and message templates, configure the audit trail in the Auditing settings.
- Display the ASM Designer window if it is not already visible on screen.
Select
and then Admin.From the submenu, select Designer.
This window consists of three tabs. They display different views:Find a Screen Can be used to search for and work with specific screens, forms or message templates, as well as create new in-house screens View screens Displays details of currently selected screens and is used to modify screens Skins Enables you to create and modify skins for your Self Service Portal(s) -
Find the screen, if it is not already displayed.
- Make the Find a Screen tab uppermost, if necessary.
- Select the entity type (such as Call) from the left pane. The table displays the configurable screens, templates and forms associated with the selected entity, with the first one highlighted. Items you cannot create or configure are not included. The number of screens associated with the selected entity is displayed in the bottom right hand corner of the window.
- Filter and sort the screens if you wish:
- Select the screen, template or form you wish to work with, and select at the bottom of the window. To select multiple screens, select one and hold down the Shift or Ctrl key and select the rest.
- The window changes and if you look in the top left corner, you will see that the View Screens tab is now uppermost.
The left pane contains an alphabetical list of the main entity types in ASM Core (such as, Agreement, Bulletin, Call, etc) with which screens are associated.
The main pane has a set of filters across the top of the window, beneath which there is a browse table, which is currently empty, containing the following fields:
Name name of the screen, template or form Screen Set to which the screen, template or form belongs Screen Design which could be Service Desk Form (linked to a particular entity, eg Call Default Form), Service Desk (the details screen used in ASM Core), Self Service Portal (submission or review screen) or Message Template (for emails generated by the system following certain events such as an Availability Breach) Customized Whether the screen, template or form has already been configured in the ASM Designer Last Modified The date and time of any modification, including when a field was created, linked to a screen set and any other modifications to field properties To filter the number of entries displayed on the table, use the fields at the top of the window:
Screen Name Type a name and select .Screen Set A drop-down list of all screen sets. Each entity type has a standard screen set which has the same name as the entity. For example, the default screen set for calls is Call Screen Set.
Certain entity types, such as Organization, Person, Agreement and Location, only have default screen sets. Others, such as Call, Request, Task, CMDB item, Contract and Knowledge can have custom screen sets and these will appear on the list. Only one Details screen and one Submission screen can exist per screen set. You can have multiple message templates and service desk forms in the same screen set.
Screen Design A drop-down list of available designs To sort the information, click on the required column heading (such as Name). The entries are displayed in alphabetical order for that column.
You can also view a history of changes to a screen, create new screens, delete and rename screens and view deleted screens from this window.
You can select the Find a Screen tab again if you wish to select a different screen.
Each selected screen, form, or message template appears in its own tab within the ASM Designer window
. The naming of the screens is [screen set name] [screen name], for example, Call Call No Details. If the screen belongs to the default screen set for an entity, the name of the tab is [entity name] [screen name], for example, Agreement Agreement Details. When you open a portal screen, such as Call Submission, two blank columns are displayed on the right. You can configure the screen by inserting fields into these columns. If you place them outside of that column grid, they will not appear on the Self Service Portal. - Make the Find a Screen tab uppermost, if necessary.
- Select Open Screen from the bottom of the window if the details are not already displayed.
- Select the element you want to remove. Details are displayed in the left hand pane, showing the properties, display name and impact of deletion.
- Select
 at the bottom of the left hand pane. or right-click the element and select Delete. Confirm the deletion when prompted.
 - Select Save at the bottom of the window to save changes to the current screen or Save As to save the content as an HTML file. The file can then be edited with any HTML editor. However, you should be aware that any instability as a result of modifications made outside the ASM Designer is not covered by your Alemba® support and maintenance agreement. When you export a screen, form or message template, images embedded on to the template are not exported. When you load an exported screen, form or message template into ASM Core, you will need to re-add any images. Save All saves changes to all open screens. If auditing is turned on, the Change Reasons window will display, prompting you to add a change reason.
- If you wish to undo the deletion, select the Undo button in the top right corner of the window. Save the changes once more.
If you select a section that contains several fields, this information is not displayed, so you should select the items individually if necessary.
Exporting a Configured Screen
You can export a screen you have altered to an HTML file. This file can then be edited in any HTML editor.
When you export a screen, form or message template, images embedded on to the template are not exported. When you load an exported screen, form or message template into ASM Core, you will need to re-add any images that existed on this template.
Before you start
You must have Designer selected in your General Access Security Role.
To maintain an audit trail of changes made to screens, forms and message templates, configure the audit trail in the Auditing settings.
- Display ASM Designer window if it is not already visible on screen.
Select
and then Admin.From the submenu, select Designer.
This window consists of three tabs . They display different views:
Find a Screen Can be used to search for and work with specific screens, forms or message templates, as well as create new custom screens View screens Displays details of currently selected screens and is used to customize screens Skins Enables you to create and modify skins for your Self Service Portal(s). -
Find the screen, if it is not already displayed.
- Make the Find a Screen tab uppermost, if necessary.
- Select the entity type (such as Call) from the left pane. The table displays the configurable screens, templates and forms associated with the selected entity, with the first one highlighted. Items you cannot create or configure are not included. The number of screens associated with the selected entity is displayed in the bottom right hand corner of the window.
- Filter and sort the screens if you wish:
- Select the screen, template or form you wish to work with, and select Open Screen at the bottom of the window. To select multiple screens, select one and hold down the Shift or Ctrl key and select the rest.
- The window changes and if you look in the top left corner, you will see that the View Screens tab is now uppermost.
The left pane contains an alphabetical list of the main entity types in ASM Core (such as, Agreement, Bulletin, Call, etc) with which screens are associated.
The main pane has a set of filters across the top of the window, beneath which there is a browse table, which is currently empty, containing the following fields:
Name name of the screen, template or form Screen Set to which the screen, template or form belongs Screen Design which could be Service Desk Form (linked to a particular entity, eg Call Default Form), Service Desk (the details screen used in the main application), Self Service Portal (submission or review screen) or Message Template (for emails generated by the system following certain events, eg Availability Breach) Customized Whether the screen, template or form has been customized Last Modified The date and time of any modification, including when a field was created, linked to a screen set and any other modifications to field properties To filter the number of entries displayed on the table, use the fields at the top of the window:
Screen Name Type a name and select Find. Screen Set A drop-down list of all screen sets. Each entity type has a standard screen set which has the same name as the entity. For example, the default screen set for calls is Call Screen Set.
Certain entity types, such as Organization, Person, Agreement and Location, only have default screen sets. Others, such as Call, Request, Task, CMDB item, Contract and Knowledge can have custom screen sets and these will appear on the list. Only one Details screen and one Submission screen can exist per screen set. You can have multiple message templates and service desk forms in the same screen set.
Screen Design A drop-down list of available designs To sort the information, click on the required column heading (such as Name). The entries are displayed in alphabetical order for that column.
You can also view a history of changes to a screen, create new screens, delete and rename screens and view deleted screens from this window.
You can select the Find a Screen tab again if you wish to select a different screen.
- Make the Find a Screen tab uppermost, if necessary.
- Select Open Screen from the bottom of the window if the details are not already displayed on screen.
- Select
 .
. - If prompted, type a change reason in the Change Reasons window.
- In the Save As dialog box, select a location, specify a file name and select Save.
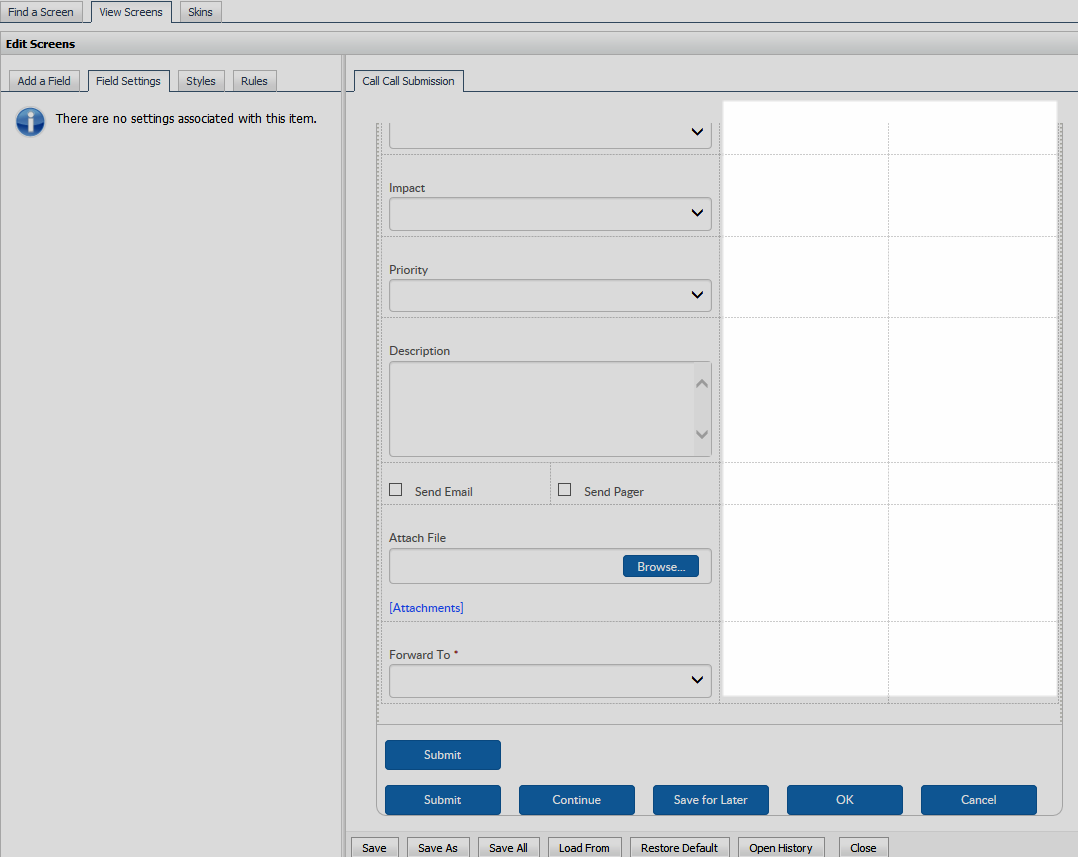
The Forward To field on a Self Service Portal Request Submission screen cannot be hidden or removed as it is a mandatory field. However, this field is automatically hidden on the screen when viewed on the portal when a Forward To Analyst or group is assigned on the Workflow Template associated with this submission form.
Viewing the Screen Change History
Details shown in the history include the name of the analyst who made the change, the date and time of the change, and the type of action which led to the change. If auditing is turned on for ASM Designer in the System Settings, the change reason also appears in the history. In this case, you can select the history entry to expand it and view the change reason.
The following is a list of actions recorded in the history:
- Load from file and Saved: The screen was loaded from an external file and saved in ASM Designer.
- Save to file: The screen was saved to an external file.
- Saved: The screen was edited and saved in ASM Designer.
- Display the ASM Designer window if it is not already visible on screen.
Select
and then Admin.From the submenu, select Designer.
This window consists of three tabs. They display different views:Find a Screen Can be used to search for and work with specific screens, forms or message templates, as well as create new in-house screens View screens Displays details of currently selected screens and is used to modify screens Skins Enables you to create and modify skins for your Self Service Portal(s) - There are two ways to open the history of a screen from here:
- With the Find a Screen tab uppermost , select a screen in the browse table and then select View History at the bottom of the window.
- With the View Screens tab uppermost , ensure you have a screen open and select
 .
. The information messages which appear in the left panel of the View Screens tab are purely informational and can be ignored for the purposes of viewing the history of a screen. These are the standard information messages which display if no screens are open in this view or you are viewing the history of a screen.
- With the Find a Screen tab uppermost
The history details appear in reverse chronological order with the most recent entry at the top. If the screen has been previously loaded from an external HTML file and then saved, a warning appears stating “This screen has been loaded from an external file. Any modification made outside of ASM Designer may result in loss or undesirable changes to functionality.”
If auditing is turned on, you will also see a Change Reasons window. You may need to expand the change heading to see the reason for change.
From here you can select from the following:
| Open Screen | The screen opens in a separate tab in the View Screens view. |
| Export History | In the Windows Save As dialog box, save the history. |
| Close | You are returned to one of the other open tabs in the View Screens view. |